PENCIL Multilayer Paper Cut Template Guide
Layered paper art has evolved from a delicate hobby into a sophisticated medium for storytelling, interior design, and professional branding. At the heart of this transformation is the ability to translate complex visual concepts into precise, cuttable formats. The PENCIL Multilayer Paper Cut Template serves as an exceptional entry point for creators who want to explore depth and dimension without starting from scratch. Whether you are a seasoned designer using industrial lasers or a hobbyist with a desktop cutting machine, this template offers a structured yet flexible foundation for creating stunning three-dimensional effects.
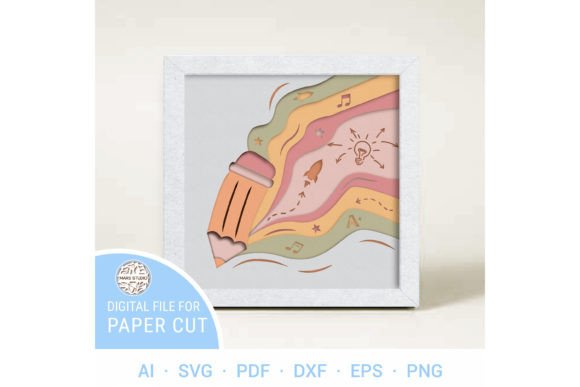
The appeal of multilayer designs lies in their simplicity of materials contrasted with the complexity of their output. By stacking seven distinct layers, you create shadows, depth, and perspective that flat images cannot achieve. This specific template is engineered to maximize these optical illusions, providing a balanced composition that looks intricate but remains manageable to assemble. It bridges the gap between digital precision and tactile craftsmanship, allowing users to produce gallery-worthy pieces with accessible tools.
Understanding the Mechanics of Layered Design
To truly appreciate the utility of the PENCIL template, one must understand the mechanics behind layered paper cutting. This craft is not merely about stacking shapes; it is about managing negative space and light. Each layer in the model acts as a filter, casting subtle shadows on the layer beneath it. When executed correctly, these shadows create a sense of volume, making a two-dimensional sheet of paper appear as a deep, immersive scene.
The PENCIL Digital multilayer svg files are specially prepared to accommodate this interplay of light and shadow. With seven distinct layers, the design provides enough depth to create a convincing 3D-like effect while maintaining structural integrity. For beginners, learning layered paper design involves mastering the relationship between these planes. You learn how much spacing is required between layers to allow shadows to form without collapsing the structure, and how to balance dense cut areas with open spaces to prevent the final piece from becoming too fragile.
This template removes the guesswork from the engineering phase. Instead of worrying about whether your design will hold together, you can focus on the artistic aspects: color selection, material texture, and lighting. The file formats provided—.AI, .SVG, .DXF, .DWG, .CDR, .EPS, and .PDF—ensure compatibility with a wide range of software and hardware, from Adobe Illustrator to CorelDRAW, and from Cricut to Silhouette machines.
Versatility Across Materials and Machines
One of the most significant advantages of this template is its material agnosticism. While often associated with cardstock, the design is robust enough to handle heavier, more durable materials. The recommended materials include plywood, MDF, acrylic, plexiglas, cardboard, and various weights of paper. This versatility opens up diverse applications for different user groups.
For those working with wood, the recommended thickness is between 3mm and 6mm (approximately 1/8in to 1/4in). This specification is crucial for maintaining the proportion of the design. If you are using a laser cutter or a CNC router, these materials transform the artwork from a delicate paper craft into a sturdy home decor item or a lasting gift. Acrylic and plexiglas options allow for modern, translucent effects, where light can pass through the layers, creating a glowing, ethereal quality that paper cannot replicate.
Digital crafters using Cricut or Silhouette machines will find the SVG files particularly useful. These files are optimized for clean cuts, ensuring that the intricate details of the pencil-themed design do not tear or jam during the cutting process. The precision of the vector paths means that even small, thin elements are defined clearly, reducing waste and frustration during the weeding process.
Creative Applications and Project Ideas
The PENCIL Multilayer Paper Cut Template is not limited to a single type of project. Its thematic focus on writing instruments makes it ideal for educational settings, literary events, and office decor. Here are several ways different creators can adapt this design:
- Educational Environments: Teachers and librarians can use this design to create engaging wall art for classrooms or reading nooks. The layered effect draws attention and can serve as a conversation starter about creativity and writing.
- Professional Branding: Graphic designers and marketers can incorporate this aesthetic into client presentations or office spaces for publishing houses, stationery brands, or creative agencies. Framed under glass, it serves as a sophisticated piece of corporate art that reflects industry values.
- Personalized Gifts: Hobbyists can customize the background layers with specific colors or patterns to match a recipient’s taste. Adding a personalized quote or name in the deepest layer transforms the template into a unique, heartfelt gift for writers, students, or artists.
- Shadow Box Lighting: By integrating LED strip lights behind the back layer, users can create a illuminated shadow box. This approach highlights the depth of the seven layers and turns the artwork into a functional night light or decorative accent piece.
Each application requires a slightly different approach to assembly and finishing. For example, a classroom display might prioritize durability and cost-effectiveness, using cardboard or heavy cardstock. In contrast, a high-end retail display might utilize acrylic or laser-cut wood to convey luxury and permanence.
Best Practices for Assembly and Finishing
Creating a polished final product requires attention to detail during the assembly phase. The PENCIL multilayer paper cut design comes with a finished product size of 8 x 8 inches, which is a compact yet impactful dimension. However, users have the flexibility to scale the design. If you choose to increase the size, ensure your cutting machine or laser bed can accommodate the larger dimensions. Conversely, when reducing the design, be cautious of the thin elements. Scaling down too much can make small details impossible to weed or cut cleanly, compromising the structural integrity of the layers.
A critical step in the process is painting or finishing the materials before gluing. Trying to paint intricate cutouts after assembly is nearly impossible and often results in messy edges and glued joints coming loose. By painting each layer individually before assembly, you ensure complete coverage and a professional finish. This is especially important when using wood or MDF, as these materials benefit from sealing to prevent warping and to enhance the grain or color.
Gluing also requires precision. Use a fine-tip applicator for adhesives to avoid excess glue squeezing out between layers, which can ruin the visual clarity of the shadows. Spacer foam or double-sided tape can be used to maintain consistent gaps between layers if you are not using pre-spaced mounts. Consistency in spacing is key to achieving uniform shadow lines throughout the piece.
Adapting for Different Audiences and Contexts
The beauty of digital templates like this lies in their adaptability. Entrepreneurs selling handmade goods can use the layered svg cricut cut file to produce batch items efficiently. By standardizing the assembly process, they can offer custom color variations to customers without redesigning the core artwork. Bloggers and content creators can use the assembly process as tutorial content, documenting the step-by-step creation to engage their audience with behind-the-scenes insights.
Educators can use the template to teach principles of design, such as contrast, balance, and depth. Students can experiment with different color theories by changing the hue of each layer, observing how adjacent colors influence the perception of depth. This hands-on approach to learning design principles is far more effective than theoretical instruction alone.
For freelancers and designers, having access to multiple file formats (.AI, .EPS, .PDF) allows for seamless integration into larger projects. You can extract elements from the template to use in digital illustrations, print media, or web graphics, extending the value of the purchase beyond physical crafting.
Maximizing Value Through Organization and Precision
To keep your workflow efficient, organize your digital files immediately after downloading the .zip folder. Unzip the folder and sort the files by format or machine type. Label your physical materials clearly before cutting to avoid confusion during assembly. When working with seven layers, keeping track of the order is essential. Numbering the back of each layer lightly with a pencil can prevent mistakes during the gluing process.
Consistency in your technique will yield the best results. Whether you are cutting paper or wood, ensure your blades or bits are sharp. Dull tools lead to jagged edges and frayed materials, which detract from the clean lines required for effective shadow play. Take your time with the weeding process, removing small inner cuts carefully to preserve the delicate bridges that hold the design together.
The PENCIL Multilayer Paper Cut Template is more than just a digital file; it is a toolkit for creative expression. It empowers users to produce high-quality, professional-looking art with confidence. By understanding the materials, respecting the design constraints, and applying thoughtful finishing techniques, you can transform simple sheets of material into captivating works of art that inspire and delight.