Mastering the TREE of LIFE Multilayer Wall Decor: A Guide to Flawless Laser Cutting and Assembly
The TREE of LIFE Multilayer Wall Decor is more than just a decorative accent; it is a statement piece that bridges the gap between natural symbolism and modern interior design. For makers, small business owners, and hobbyists, this design offers a lucrative opportunity to create high-value art. However, the difference between a professional-grade finish and a disappointing result often lies in the preparation and execution phases. Many creators rush into cutting without fully understanding the nuances of multilayer assembly, leading to wasted materials and frustrated customers.
This guide addresses the common pitfalls associated with producing this intricate wood art panel. By understanding the technical requirements and avoiding typical errors, you can ensure your finished product exudes the artistic sophistication it was designed for.
Understanding the Design Complexity
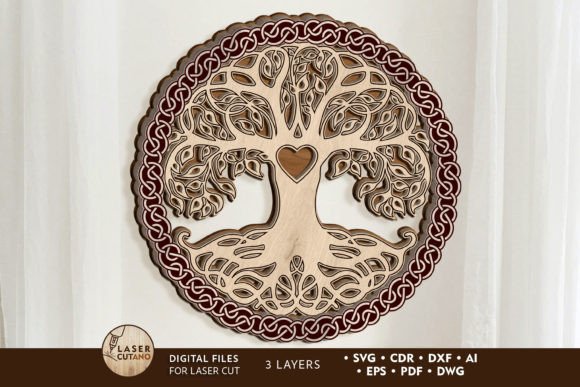
The TREE of LIFE design is meticulously crafted to feature three distinct layers. This multilayer approach creates depth and shadow, giving the flat material a three-dimensional appearance. The finished product measures approximately 14.5 x 14.5 inches, a size that is substantial enough to be a focal point yet versatile enough for various living spaces. Because the design includes engraving details alongside cut lines, it requires precision machinery such as laser cutters, CNC routers, or plasma cutters.
Before you begin, it is crucial to recognize that this is not a single-layer project. The interplay between the layers is what defines its aesthetic appeal. Misunderstanding this complexity is the first mistake many beginners make. They treat it as a simple cutout rather than a constructed assembly, which leads to alignment issues and a lack of structural integrity in the final piece.
Mistake 1: Ignoring Material Thickness Specifications
One of the most frequent errors occurs when creators select materials that do not match the design’s specifications. The recommended material thickness for wood in this project is strictly between 3 mm and 6 mm (approximately 1/8 inch to 1/4 inch). Using plywood, MDF, acrylic, plexiglas, or cardboard outside this range can cause significant assembly problems.
If your material is too thick, the layers will not stack flush, creating unsightly gaps and making the piece look bulky rather than elegant. Conversely, if the material is too thin, the structural stability of the delicate branches and leaves may be compromised, leading to breakage during handling or shipping. Always measure your stock before loading it into your machine. Do not assume that "3mm plywood" is exactly 3.00mm; manufacturing tolerances vary, and even a fraction of a millimeter can affect the fit of press-fit joints or glue surfaces.
Mistake 2: Neglecting the Pre-Painting Step
A critical oversight in the production of multilayer wall art is attempting to paint the piece after assembly. The instructions clearly state: Paint before gluing. This is not merely a suggestion; it is a necessity for a professional finish.
Once the three layers are glued together, accessing the inner edges and recessed areas becomes nearly impossible. If you assemble first and paint later, you will likely miss spots, leave visible glue marks, or create uneven coats on the vertical sides of the layers. The better approach is to cut all layers, sand them lightly to remove char marks (if using laser cutting), and apply your chosen finish—whether stain, paint, or clear coat—to each individual layer. Allow them to dry completely before assembly. This ensures that every visible surface, no matter how deep, has a consistent and polished appearance.
Mistake 3: Improper File Handling and Scaling
Upon purchase, you receive a .zip file containing formats such as .AI, .SVG, .DXF, .DWG, .CDR, .EPS, and .PDF. A common mistake is attempting to use these files without properly unzipping the folder first, which can lead to corrupted data or missing links within vector software. Always extract the contents to a dedicated project folder before opening them in your design software.
Furthermore, while the design allows for scaling up, reducing the size requires extreme caution. The TREE of LIFE features thin elements, such as fine branches and intricate leaf patterns. If you reduce the overall dimensions significantly, these delicate parts may become too fragile to cut cleanly or may break during the weeding process. If you must downsize, test cut a small section first to ensure the structural integrity of the thinnest lines. For best results, stick to the original 14.5 x 14.5 inch dimensions or scale up to maintain the robustness of the design.
Mistake 4: Overlooking Engraving Settings
This design includes engraving elements that add texture and detail to the wood surface. Many operators focus solely on the cut lines and ignore the engraving settings, resulting in burns that are either too shallow to be seen or so deep they weaken the material.
To avoid this, perform test runs on scrap pieces of the exact same material you intend to use. Adjust your laser’s power and speed settings to achieve a crisp, clean engrave that contrasts nicely with the cut edges. Remember that different materials react differently; acrylic may require different settings than plywood. Taking the time to dial in these settings prevents the need for post-processing cleanup and ensures the artistic details shine through.
Best Practices for Assembly and Quality Control
Assembly is the final stage where your attention to detail pays off. Use a high-quality wood glue or adhesive suitable for your chosen material. Apply glue sparingly to avoid squeeze-out, which can ruin your pre-painted finish. Use clamps or weights to hold the layers together firmly while the adhesive cures. Ensure that the layers are perfectly aligned; even a slight misalignment can disrupt the visual flow of the tree’s branches.
Before packaging or hanging the piece, inspect it under good lighting. Check for any loose edges, visible glue residues, or uneven paint coverage. A quick quality control check ensures that the piece meets the high standards expected of TREE of LIFE Multilayer Wall Decor.
Choosing the Right Machine for the Job
While this design is compatible with laser cutters, CNC routers, and other cutting machines, each has its strengths. Laser cutters offer superior precision for the intricate details and engraving, making them ideal for wood and acrylic. CNC routers are excellent for thicker materials but may struggle with the finest details unless equipped with very small bits. Choose the machine that best matches your material choice and desired level of detail. For beginners, a laser cutter is often the most forgiving and efficient option for this type of project.
By avoiding these common mistakes and adhering to the recommended practices, you can produce a TREE of LIFE wall art piece that is not only visually stunning but also durable and professionally finished. Whether you are creating this for your home or for sale, attention to detail in every step—from file preparation to final assembly—will elevate your work from a simple craft project to a captivating work of art.